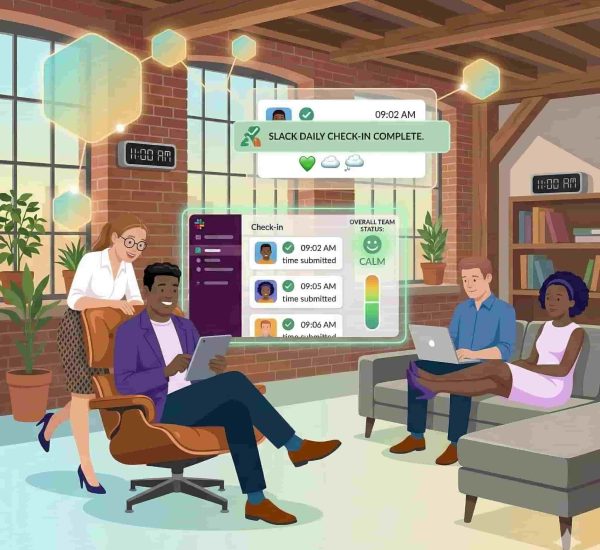
Slack is an awesome collaboration app that’s been gaining immense popularity in the world of business and tech. Businesses use Slack to share and update each other on files, new updates, feedback, advice, and chats. Slack screen sharing is a great addition to this amazing app. This article describes everything about the Slack screen sharing feature in detail.
Slack’s screen sharing feature is a great way to collaborate with others on projects or simply show someone what you’re working on. Here’s how to use it:

How to Share Screen on Slack?
Open the Slack app or open your Slack workspace in your browser. In a direct message, select the Call button in the right-hand panel to begin a call. 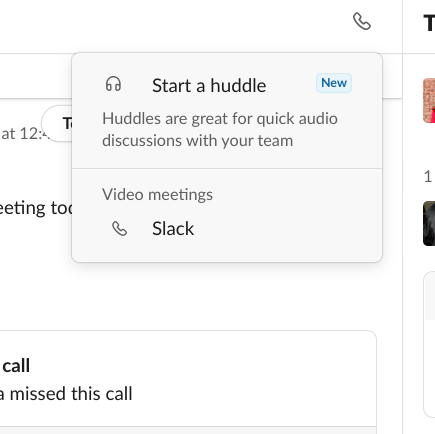
A pop-up window will appear with a few options for sharing your screen. You can choose to share your entire screen, a particular window, or a specific application. Once you’ve made your selection, click Share Screen.

When you’re on the video call and are sharing the screen, you will several other options at the bottom of the screen. Two of these interesting features are Draw and Draw together.

Some Rules For the Slack Screen Sharing
- Slack’s screen sharing feature is a great way to collaborate with team members on projects. However, there are a few rules that apply when using this feature. Only one user can share their screen at any one time, and the user who is sharing their screen becomes the active user for the duration of the screen-sharing session.
- This means that no other camera feeds become prominent. If another user wants to share their screen, they will need to wait for the first user to finish sharing before they can start. Screen sharing can be a great way to collaborate on projects, but it’s important to be aware of these rules before using the feature.
- In addition, the presenter’s screen video will be disabled during Slack screen sharing in order to avoid interruptions and distractions. Slack message notifications will also be muted to allow the presenter to focus on their presentation. This will ensure that the audience can see and hear the presentation without any distractions. By disabling the Slack screen sharing, the presenter can be sure that their message is being communicated effectively.
How to Stop Sharing?
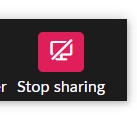
Lastly, To stop sharing the screen simply click on the red icon shown below and you will return to a standard video call.
If you’re sharing your entire screen or a particular window, you’ll see a preview of what you’re sharing in the bottom-left corner of your screen. If you’re sharing an application, only that application will be visible to others.
To stop sharing your screen, click the Stop Sharing button in the bottom-right corner of your screen.
Why Use The Slack Screen Sharing Feature?
When it comes to screen sharing there can be several pros. By the Slack screen sharing feature, you can easily share your screen with a colleague or friend and view their Slack workspace on your own device and do much more. This is great for remote teams who need to collaborate on projects.
Draw Feature
One feature that makes Slack screen sharing a little more fun and unique is the option to draw. The Draw feature on Slack Screen Sharing is a great way to annotate documents or share ideas with team members in real-time. To use the Draw feature, simply click on the pencil icon in the top right corner of your Slack window.
This will bring up a palette of colors to choose from. Once you’ve selected a color, you can start drawing on your document. Your teammates will be able to see your drawings in real-time, and you can even use the eraser tool to make corrections. The Draw feature is a great way to get your point across without having to type out a long explanation. Plus, it’s just plain fun!
Draw Together Feature
Slack Screen Sharing is a great way to share your screen with others in real-time. Not only does it allow you to see what others are seeing, but you can also draw on the screen to highlight important points. The draw-together feature is especially useful for team collaboration. With it, you can draw attention to a specific area of the screen and add annotations in real-time. This makes it easy to explain ideas or give instructions. And because everyone is looking at the same thing, there’s no need to worry about miscommunication. Slack Screen Sharing is a valuable tool for any team that wants to work together more effectively.
Who Can Use Slack Screen Sharing?
Starting at just $6.67 per month, Slack Lite users have access to features like Slack screen sharing that other similar messaging apps don’t provide. And if you need more than the basics, there are two paid tiers of service—Standard and Plus—that offer additional features like unlimited Slack screen sharing and storage, advanced security controls, and priority customer support. For enterprise-level businesses, there’s also an Enterprise Grid tier that offers even more features and customization options. No matter what your needs are, Slack has a plan that’s right for you.
Are There Any Alternatives?
There can be days when your Slack screen sharing won’t work. For days like those, you’ll want to look for an alternative where you can share your screen with your colleague/client, etc. Let’s look at some of the best alternatives:
Alternative #1: Facetime on Mac
Are you a Mac user? This alternative is the perfect solution for you.
Here’s what You Need
- An iPhone or iPad
- iOS or iPadOS 15.1 or later
Share your screen
- Start a FaceTime call.
- Tap the Share Content button.
- Tap Share My Screen.
And that’s it! Everyone can see what’s on your screen until you stop sharing, but they can’t control anything on your device. If you get any notifications while sharing your screen, others won’t be able to see them.
Alternative #2: Zoom
To share your screen or content:
- Click Share Screen located in your meeting controls.
Select one of these screen share options:
Basic:
Share your entire desktop, specific application windows, whiteboard, or iPhone/iPad screen.
Note: Users can select multiple desktop programs at once instead of sharing their entire desktop, but all selected programs must be on the same screen to be visible. Only the user employing this feature will need to be on version 5.4.3 or higher while viewers can be connected with older versions. Hold the Shift key on macOS or the Ctrl key on Windows to select more than one application.
Advanced:
Slides / PowerPoint as Virtual Background: This allows you to utilize a slideshow presentation as your virtual background, providing a more immersive presentation.
Portion of Screen: Share a portion of your screen represented by a green border. The border can be adjusted as needed during the share by clicking and dragging any side or corner.
Video: Share locally stored video content through Zoom’s native video player.
Content from 2nd Camera: Share a secondary camera connected to your computer; for example, a document camera or the integrated camera on your laptop.
Files: Share a file from a third-party sharing service like Google Drive or Microsoft OneDrive. Follow the on-screen prompts to sign in to the third-party service and grant Zoom access.
Click Share
When the sharing process is started and 80% of devices acknowledge receiving the shared screen, you will see a notification banner stating Participants can now see your shared screen, or whatever you have chosen to share.
Alternative #3: TeamViewer
The third option is to use TeamViewer which is also a great solution to share and view someone’s screen.
I’ll cut to the chase, Slack screen sharing is a great feature. It’s fast, and easy to use and it allows you to share your screen with somebody else without them even having to install the Slack desktop client on their computer. It saves time, it saves bandwidth and it means that many more people can see your screen than ever before. What else could you want?