Sometimes you don’t have the time or the money to get your headshot done by a professional photographer. So it makes you wonder if you can take your professional headshots at home. Turns out, yes you can.
Before we deep dive into steps to take a professional headshot, let’s be clear on what a good picture looks like.
A professional photo conveys likeability, competence, and influence. It has the following:
- Good eye contact
- A subtle smile
- A level of squinting
How to Take a Headshot?
Here is a list of DIY steps that will help you whether you’re planning to take a professional headshot for your Linkedin profile, a personal website, or for other reasons. We have divided these steps into two categories: pre-shot and post-shot
Before the Shoot
Get a Friend or a Tripod
Usually, selfies don’t make for good headshots. To make sure your pictures turn out well, seek a friend’s help. You can also buy a tripod for this purpose but it is better to have a friend. Friends can help you get better angles and provide feedback that a tripod can’t.
However, if you are on your own, then a tripod is a good investment. You also have to buy a phone holder so that your phone camera can take a picture from chest height. You can set a timer and pose for a picture.
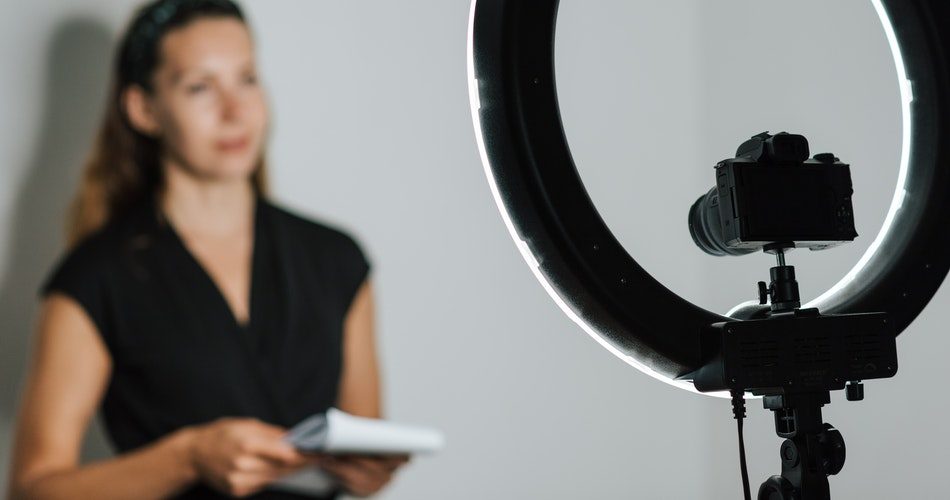
Select a Location With Good Lightning
The best location for professional headshots is indoors and in front of a solid background. The idea is for your headshot to turn out professional like one of a studio. In case you don’t have a solid-colored wall in your house, you can buy a backdrop online as well.
Furthermore, you need sunlight for your pictures to turn out good but not directly on your face. Direct sunlight can be harsh and make you squint.
You can also take a picture outdoors. The trick is to find an open shade which is referred to as a spot between sun and shade. Basically, you’re inside the shade but face the sun.
Invest in Additional Lightning if You’re Indoors
Good light is the hardest thing to get in a professional headshot. If you’re planning to take a picture indoors, then make sure to invest in artificial lighting.
Install Camera Apps on Your Phone
If you’re taking a headshot with a professional camera, then you can skip this point. But, if you’re using a phone, then you may want to keep reading.
If you’re using iOS then you may want to download GorillaCam or Open Camera for Android users.
Create Space in Your Phone
Before you begin your shoot, you would want to clear up space in your phone so that you have enough memory for the headshots you will take. And there are going to be hundreds of them. The last thing you would want to do is pause in the middle of the shoot to clear up space in your phone.
Spend at Least Two Hours on the Shoot
Taking a professional headshot will is time-consuming. You can’t get it done in a half-hour break from work. Don’t rush through it if you want the best results. Take your time to set up your equipment, taking the photos and shortlisting the best ones.
Practice in the Mirror
This may sound weird but practicing your pose in the mirror will speed up the process for you. Practicing poses that really make your personality stand out will help you during the shoot.
During the Shoot
Look Good
Now, you don’t have to put on tons of makeup because that will make you look totally different. You should look like yourself. Spend some time putting together a nice hairdo, neutral makeup, and nice clothes. If you have dark circles, try concealing them for a nice picture. If you’re not used to styling yourself that often, we recommend you call a friend over for some help.
Be Mindful of Your Shirt
What you wear in a professional headshot will convey a message about you. And of course, you would want to send out a positive one. You don’t have to worry about your lower half and shoes as professional headshots only show until mid-chest.
Set Up the Lighting
This is the most crucial stage of taking professional headshots. There are several different ways to go about it. You may not get it right on the first attempt but that’s okay. Do some initial trial and error and you will eventually get it right.
If you’re shooting outdoors, you have to find the open shade as mentioned earlier. Once in that spot, make sure to face the sunlight, or else your picture will not turn out good enough.
In case you’re shooting indoors, you have to set up your artificial lights. Make sure to set your lights at least 2 feet away from where you will be positioned to avoid ugly shadows. The best light usually comes from slightly above the head.
For your professional headshot to come out natural, have two lights on each side. If you only have one light, place it in the center and back it up a little to avoid looking too dramatic.
Time to Position Your Camera
After the lighting is set up, it’s time to set your camera. If you are using your phone camera, then make sure to use the back camera and not the front one. This is because back cameras have a higher resolution.
You also have to make sure that the height of the camera lens is about at your chin.
As mentioned earlier, your camera should be two to three feet away from where you’ll be sitting or standing.
Position Yourself
After setting the equipment, it’s time to shift the focus on you. Avoid sitting squarely in front of the camera. Instead, sitting at 30 degrees right or left to the camera and turn your face to look into the camera directly.
Keep in mind that eye contact is the most important part of taking professional headshots. It’s what’s going to grab the viewer’s attention, so look into the camera.
Laugh and Talk to Yourself to Set the Mood
When you start taking pictures, you may find yourself feeling stiff and forcing a smile. So, you can do a few things that will help you loosen up a bit.
One of the tricks is to make yourself laugh. This will make your headshot look friendly, approachable, and happy.
You don’t have to laugh while the camera clicks your picture. Instead, transition your laugh into a subtle smile. It will look more natural.
Another trick is to turn on some lively and energetic music to lift your mood up.
Take Several Pictures and Examine Them as You Go
As mentioned earlier, you have to set apart at least two hours to get a professional headshot. This means you will end up taking hundreds of pictures.
However, don’t just take pictures and leave the assessment part for the end. It will only cost you your time and effort. Instead, as you take pictures, pause in between to assess, review and scrutinize them. Adjust the angle or lighting as needed. Make changes to your pose and see which one produces the best results.
However, in order to take tons of pictures, you must have memory on your phone. So free up as much space as possible because you can always go back and delete pictures that you don’t want.
After the Shoot
Shortlist 20 Best Photos
After getting done with the shoot, get down to s selecting the best 20. Review each picture, delete the bad ones and pick your favorite ones.
Tip: If you’re an iOS user, you can move the selected pictures to the ‘favorite’ folder in your album. This way you can easily access them.
Once you have shortlisted the best ones, have a friend examine them. Sometimes we are not able to read our body language and expressions as vividly as others can. So, a friend will pick the best one out, the one which makes us look professional and neutral.
Edit Using Some Apps
Once you have your best shot, it’s time to give it a little touch-up.
If you know photoshop, that’s your best bet. However, if you don’t then you can choose from several editing apps.
- Afterlight
- VSCO Cam
- Photoshop Express
- Snapspeed
- SKRWT
- Live Collage
- Instasize
- Foodie
- Camera+
- Mextures
- Enlight
- Facetune
- Visage Makeup Editor
Editing apps help you in the following ways:
- Control color tones
- Adjusting exposure and brightness
- Straightening the photo
- Toning down the saturation
- Getting rid of blemishes
Finally, Crop and Crop
The final step is to crop your headshot as per the need and requirements. Below is a list of profile photo sizes for different social media platforms:
- Facebook: 180 px wide by 180 px tall
- Instagram: 110 px wide by 110 px tall
- Pinterest: 165 px wide by 165 px tall
- Google+: 250 px wide by 250 px tall
- LinkedIn: 400 px wide by 400 px tall
- Twitter: 400 px wide by 400 px tall
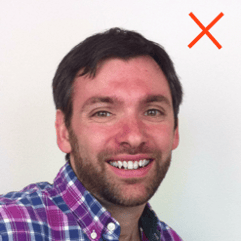
While cropping your photo, be mindful of the following points:
- Don’t crop a square around your face.
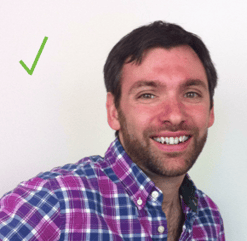
- For better composition of your picture, follow the rule of thirds. This means breaking your image into thirds both horizontally and vertically so you end up having nine parts.
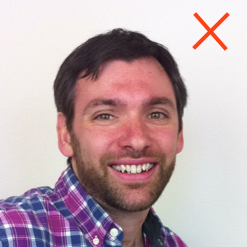
Below is a bad example of cropping. This is because the picture has been cropped with the head right in the middle of the frame.
Now have a look at the picture below. It uses the rule of thirds. The composition of the picture looks pleasing to the eye.
What Outfits Should I Wear for Professional Headshots?
Although we have touched upon this topic earlier in this article, let’s look at some more minute details.
The rule of thumb is to dress like you’re going for an interview. Keep it professional yet simple. Nothing fancy or extravagant. Here are some additional tips:
- Wear solid and muted colors. Avoid patterns as they can be distracting.
- Try wearing full-sleeved shirts.
- Finish off your look with a blazer for a professional look.
- Wear minimum jewelry. The aim is to draw attention to you, not your accessories.
- A slight pop of color is acceptable but don’t go overboard with it. Try to keep it classic.
Ready to Give It a Shot?
Now that you know the steps to a DIY professional headshot, you can take a shot at it. Remember that your headshot is a representation of yourself so make sure it’s a good and positive one.
Ideally, there is no need to update your headshots before 2 years. But if your appearance changes such as drastic changes in hair or weight, then you would want to get a new headshot.
Don’t forget to make notes of the tips this article has for certain steps. Keep those in mind and you’re good to go.
Happy Snapping!


